You need to use the kldload command. It loads file.ko (kernel module or device drive) into the kernel using the kernel linker. The syntax is:
kldload module-name
OR
kldload module-name-1 module-name-2
OR
kldload [option] module-name
Please note that if multiple modules are specified then an attempt will be made to load them all, even if some fail. The .ko extension name is not mandatory when loading a given module using kldload. It does not hurt to specify it though.
/boot/kernel directory
/boot/kernel# ls -l /boot/kernel/
# ls -l /boot/kernel/ | more
Examples
Open a terminal or login using ssh. You must login as root user:
# kldload foo
# kldload drm
To load by file name within the module path:
# kldload drm.ko
To load by relative path in the current dir:
# kldload ./name.ko
To load by full path:
# kldload /boot/kernel/drm.ko
To see all loaded modules, enter:
# kldstat
To remove or unload module, enter:
# kldunload drm
]]>
How do I find out the current directory location and shell script directory location in Bash running on Linux or Unix like operating systems?
You can use any one of the following method to find out the portion of pathname:
basename command – Display filename portion of pathname.
dirname command – Display directory portion of pathname.
Bash parameter substitution.
$0 expands to the name of the shell or shell script.
Examples: Shell script find out which directory the script file resides
The following example display directory path or portion of /home/nixcraft/scripts/foo.sh:
dirname /home/nixcraft/scripts/foo.sh
Sample outputs:
/home/nixcraft/scripts
The following line sets the shell variable i to /home/nixcraft/scripts:
i=dirname /home/nixcraft/scripts/foo.sh
echo $i
OR
i=$(dirname /home/nixcraft/scripts/foo.sh)
echo $i
In bash script use $0 instead of /home/nixcraft/scripts/foo.sh:
#!/bin/bash
script= $0
basename= $(dirname $script)
echo Script name $script resides in $basename directory.
Sample outputs:
Script name /tmp/test.sh resides in /tmp directory.
Using bash shell ${var%pattern} syntax
To Remove from shortest rear (end) pattern use the following syntax:
var=${path%/*}
For example:
x= /Users/nixcraft/scripts/bar.sh
echo ${x%/*}
y= ${x%/*}
echo $y
An updated version of the above script:
#!/bin/bash
# Purpose : Linux / Unix shell script find out which directory this script file resides
# Author : nixCraft <http://www.cyberciti.biz> under GPL v2.x+
# ————————————————————————————-
script= $0
basename= ${script%/*}
config1= ${basename}/.backup
config2= ${basename}/.ignore
config3= ${basename}/.target
echo Script name $script resides in $basename directory.
echo Reading config file $config1 $config2 $config3, please wait…
Run it as:
$ chmod +x /tmp/test.sh
$ /tmp/test.sh
Sample outputs:
Fig.01 Sample run from test.sh
A note about finding physical or real path
You may not get a real physical path and real path may be a symbolic link. To get physical path use realpath command. The realpath command uses the realpath() function to resolve all symbolic links, extra / characters and references to /./ and /../ in path. This is useful for shell scripting and security related applications.
Another recommended option is to use the readlink command to display value of a symbolic link or canonical file name:
#!/bin/bash
# Purpose : Linux / Unix shell script find out which directory this script file resides
# Author : nixCraft <http://www.cyberciti.biz> under GPL v2.x+
# ————————————————————————————-
Who am i? ##
Get real path ##
_script= $(readlink -f ${BASH_SOURCE[0]})
Delete last component from $_script ##
_mydir= $(dirname $_script)
Delete /path/to/dir/ component from $_script ##
_myfile= $(basename $_script)
echo Script : $_script
echo Directory portion of $_script : $_mydir
echo Filename portion of $_script : $_myfile
Save and close the file. Run it as follows:
./demo.bash
cd /home/vivek/
../../tmp/demo.bash
/tmp/demo.bash
Sample outputs:
Fig.02: Finding real path
See also
See man pages for more info – basename(1), dirname(1), bash(1)
]]>
ow do I create and setup an OpenSSH config file to create shortcuts for servers I frequently access under Linux or Unix desktop operating systems?
A global or local configuration file for SSH client can create shortcuts for sshd server including advanced ssh client options. You can configure your OpenSSH ssh client using various files as follows to save time and typing frequently used ssh client command line options such as port, user, hostname, identity-file and much more:
System-wide SSH client configuration files
/etc/ssh/ssh_config : This files set the default configuration for all users of OpenSSH clients on that desktop/laptop and it must be readable by all users on the system.
User-specific SSH client configuration files
~/.ssh/config or $HOME/.ssh/config : This is user’s own configuration file which, overrides the settings in the global client configuration file, /etc/ssh/ssh_config.
~/.ssh/config file rules
The rules are as follows to create an ssh config file:
You need to edit ~/.ssh/config with a text editor such as vi.
One config parameter per line is allowed in the configuration file with the parameter name followed by its value or values. The syntax is:
config value
config1 value1 value2
You can use an equal sign (=) instead of whitespace between the parameter name and the values.
config=value
config1=value1 value2
All empty lines are ignored.
All lines starting with the hash (#) are ignored.
All values are case-sensitive, but parameter names are not.
Tip : If this is a brand new Linux, Apple OS X/Unix box, or if you have never used ssh before create the ~/.ssh/ directory first using the following syntax:
mkdir -p $HOME/.ssh
chmod 0700 $HOME/.ssh
Examples
For demonstration purpose my sample setup is as follows:
Local desktop client – Apple OS X or Ubuntu Linux.
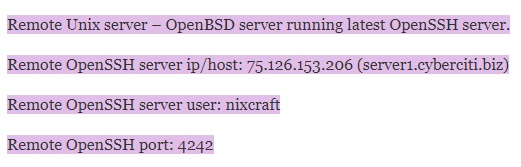
Remote Unix server – OpenBSD server running latest OpenSSH server.
Remote OpenSSH server ip/host: 75.126.153.206 (server1.cyberciti.biz)
Remote OpenSSH server user: nixcraft
Remote OpenSSH port: 4242
Local ssh private key file path : /nfs/shared/users/nixcraft/keys/server1/id_rsa
Based upon the above information my ssh command is as follows:
$ ssh -i /nfs/shared/users/nixcraft/keys/server1/id_rsa -p 4242 nixcraft@server1.cyberciti.biz
OR
$ ssh -i /nfs/shared/users/nixcraft/keys/server1/id_rsa -p 4242 -l nixcraft server1.cyberciti.biz
You can avoid typing all of the ssh command parameters while logging into a remote machine and/or for executing commands on a remote machine. All you have to do is create an ssh config file. Open the Terminal application and create your config file by typing the following command:
edit file in $HOME dir
vi ~/.ssh/config
OR
edit file in $HOME dir
vi $HOME/.ssh/config
Add/Append the following config option for a shortcut to server1 as per our sample setup:
Host server1
HostName server1.cyberciti.biz
User nixcraft
Port 4242
IdentityFile /nfs/shared/users/nixcraft/keys/server1/id_rsa
Save and close the file. To open your new SSH session to server1.cyberciti.biz by typing the following command:
$ ssh server1
Adding another host
Append the following to your ~/.ssh/config file:
Host nas01
HostName 192.168.1.100
User root
IdentityFile ~/.ssh/nas01.key
You can simply type:
$ ssh nas01
Putting it all together
Here is my sample ~/.ssh/config file that explains and create, design, and evaluate different needs for remote access using ssh client:
default for all ##
Host *
ForwardAgent no
ForwardX11 no
ForwardX11Trusted yes
User nixcraft
Port 22
Protocol 2
ServerAliveInterval 60
ServerAliveCountMax 30
override as per host ##
Host server1
HostName server1.cyberciti.biz
User nixcraft
Port 4242
IdentityFile /nfs/shared/users/nixcraft/keys/server1/id_rsa
Home nas server ##
Host nas01
HostName 192.168.1.100
User root
IdentityFile ~/.ssh/nas01.key
Login AWS Cloud ##
Host aws.apache
HostName 1.2.3.4
User wwwdata
IdentityFile ~/.ssh/aws.apache.key
Login to internal lan server at 192.168.0.251 via our public uk office ssh based gateway using ##
$ ssh uk.gw.lan ##
Host uk.gw.lan uk.lan
HostName 192.168.0.251
User nixcraft
ProxyCommand ssh nixcraft@gateway.uk.cyberciti.biz nc %h %p 2> /dev/null
Our Us Proxy Server ##
Forward all local port 3128 traffic to port 3128 on the remote vps1.cyberciti.biz server ##
$ ssh -f -N proxyus ##
Host proxyus
HostName vps1.cyberciti.biz
User breakfree
IdentityFile ~/.ssh/vps1.cyberciti.biz.key
LocalForward 3128 127.0.0.1:3128
Understanding ~/.ssh/config entries
Host : Defines for which host or hosts the configuration section applies. The section ends with a new Host section or the end of the file. A single * as a pattern can be used to provide global defaults for all hosts.
HostName : Specifies the real host name to log into. Numeric IP addresses are also permitted.
User : Defines the username for the SSH connection.
IdentityFile : Specifies a file from which the user’s DSA, ECDSA or DSA authentication identity is read. The default is ~/.ssh/identity for protocol version 1, and ~/.ssh/id_dsa, ~/.ssh/id_ecdsa and ~/.ssh/id_rsa for protocol version 2.
ProxyCommand : Specifies the command to use to connect to the server. The command string extends to the end of the line, and is executed with the user’s shell. In the command string, any occurrence of %h will be substituted by the host name to connect, %p by the port, and %r by the remote user name. The command can be basically anything, and should read from its standard input and write to its standard output. This directive is useful in conjunction with nc(1) and its proxy support. For example, the following directive would connect via an HTTP proxy at 192.1.0.253:
ProxyCommand /usr/bin/nc -X connect -x 192.1.0.253:3128 %h %p
LocalForward : Specifies that a TCP port on the local machine be forwarded over the secure channel to the specified host and port from the remote machine. The first argument must be [bind_address:]port and the second argument must be host:hostport.
Port : Specifies the port number to connect on the remote host.
Protocol : Specifies the protocol versions ssh(1) should support in order of preference. The possible values are 1 and 2.
ServerAliveInterval : Sets a timeout interval in seconds after which if no data has been received from the server, ssh(1) will send a message through the encrypted channel to request a response from the server. See blogpost “Open SSH Server connection drops out after few or N minutes of inactivity” for more information.
ServerAliveCountMax : Sets the number of server alive messages which may be sent without ssh(1) receiving any messages back from the server. If this threshold is reached while server alive messages are being sent, ssh will disconnect from the server, terminating the session.
Speed up ssh session
Multiplexing is nothing but send more than one ssh connection over a single connection. OpenSSH can reuse an existing TCP connection for multiple concurrent SSH sessions. This results into reduction of the overhead of creating new TCP connections. Update your ~/.ssh/config:
Host server1
HostName server1.cyberciti.biz
ControlPath ~/.ssh/controlmasters/%r@%h:%p
ControlMaster auto
See “Linux / Unix: OpenSSH Multiplexer To Speed Up OpenSSH Connections” for more info. In this example, I go through one host to reach another server i.e. jump host using ProxyCommand:
~/.ssh/config ##
Host internal
HostName 192.168.1.100
User vivek
ProxyCommand ssh vivek@vpn.nixcraft.net.in -W %h:%p
ControlPath ~/.ssh/controlmasters/%r@%h:%p
ControlMaster auto
For more info see following tutorials:
How To Reuse SSH Connection To Speed Up Remote Login Process Using Multiplexing
How To Setup SSH Keys on a Linux / Unix System
A note about shell aliases (outdated method)
WARNING! This bash shell aliased based setup may work out for you. However, I recommend that you use ~/.ssh/config file for better results in a long run. SSH config file is more advanced and elegant solutions. The alias command only used here for demo purpose and it is here due to historical reasons.
An alias is nothing but shortcut to commands and you can create the alias use the following syntax in your ~/.bashrc file:
create a new bash shell alias as follow ##
alias server1= ssh -i /nfs/shared/users/nixcraft/keys/server1/id_rsa -p 4242 nixcraft@server1.cyberciti.biz
Then, to ssh into the server1, instead of typing full ssh -i /nfs/shared/users/nixcraft/keys/server1/id_rsa -p 4242 nixcraft@server1.cyberciti.biz command, you would only have to type the command ‘server1’ and press the [ENTER] key:
$ server1
References
See ssh_config(5) for more information on syntax and some of the other available options.
Top 20 OpenSSH Server Best Security Practices
]]>
A global or local configuration file for SSH client can create shortcuts for sshd server including advanced ssh client options. You can configure your OpenSSH ssh client using various files as follows to save time and typing frequently used ssh client command line options such as port, user, hostname, identity-file and much more:
System-wide SSH client configuration files
/etc/ssh/ssh_config : This files set the default configuration for all users of OpenSSH clients on that desktop/laptop and it must be readable by all users on the system.
User-specific SSH client configuration files
~/.ssh/config or $HOME/.ssh/config : This is user’s own configuration file which, overrides the settings in the global client configuration file, /etc/ssh/ssh_config.
~/.ssh/config file rules
The rules are as follows to create an ssh config file:
You need to edit ~/.ssh/config with a text editor such as vi.
One config parameter per line is allowed in the configuration file with the parameter name followed by its value or values. The syntax is:
config value
config1 value1 value2
You can use an equal sign (=) instead of whitespace between the parameter name and the values.
config=value
config1=value1 value2

Tip : If this is a brand new Linux, Apple OS X/Unix box, or if you have never used ssh before create the ~/.ssh/ directory first using the following syntax:
mkdir -p $HOME/.ssh
chmod 0700 $HOME/.ssh
Examples
For demonstration purpose my sample setup is as follows:
Local desktop client – Apple OS X or Ubuntu Linux.
Local ssh private key file path : /nfs/shared/users/nixcraft/keys/server1/id_rsa
Based upon the above information my ssh command is as follows:
$ ssh -i /nfs/shared/users/nixcraft/keys/server1/id_rsa -p 4242 nixcraft@server1.cyberciti.biz
OR
$ ssh -i /nfs/shared/users/nixcraft/keys/server1/id_rsa -p 4242 -l nixcraft server1.cyberciti.biz
You can avoid typing all of the ssh command parameters while logging into a remote machine and/or for executing commands on a remote machine. All you have to do is create an ssh config file. Open the Terminal application and create your config file by typing the following command:
edit file in $HOME dir
vi ~/.ssh/config
OR
edit file in $HOME dir
vi $HOME/.ssh/config
Add/Append the following config option for a shortcut to server1 as per our sample setup:
Host server1
HostName server1.cyberciti.biz
User nixcraft
Port 4242
IdentityFile /nfs/shared/users/nixcraft/keys/server1/id_rsa
Save and close the file. To open your new SSH session to server1.cyberciti.biz by typing the following command:
$ ssh server1
Adding another host
Append the following to your ~/.ssh/config file:
Host nas01
HostName 192.168.1.100
User root
IdentityFile ~/.ssh/nas01.key
You can simply type:
$ ssh nas01
Putting it all together
Here is my sample ~/.ssh/config file that explains and create, design, and evaluate different needs for remote access using ssh client:
default for all ##
Host *
ForwardAgent no
ForwardX11 no
ForwardX11Trusted yes
User nixcraft
Port 22
Protocol 2
ServerAliveInterval 60
ServerAliveCountMax 30
override as per host ##
Host server1
HostName server1.cyberciti.biz
User nixcraft
Port 4242
IdentityFile /nfs/shared/users/nixcraft/keys/server1/id_rsa
Home nas server ##
Host nas01
HostName 192.168.1.100
User root
IdentityFile ~/.ssh/nas01.key
Login AWS Cloud ##
Host aws.apache
HostName 1.2.3.4
User wwwdata
IdentityFile ~/.ssh/aws.apache.key
Login to internal lan server at 192.168.0.251 via our public uk office ssh based gateway using ##
$ ssh uk.gw.lan ##
Host uk.gw.lan uk.lan
HostName 192.168.0.251
User nixcraft
ProxyCommand ssh nixcraft@gateway.uk.cyberciti.biz nc %h %p 2> /dev/null
Our Us Proxy Server ##
Forward all local port 3128 traffic to port 3128 on the remote vps1.cyberciti.biz server ##
$ ssh -f -N proxyus ##
Host proxyus
HostName vps1.cyberciti.biz
User breakfree
IdentityFile ~/.ssh/vps1.cyberciti.biz.key
LocalForward 3128 127.0.0.1:3128
Understanding ~/.ssh/config entries
Host : Defines for which host or hosts the configuration section applies. The section ends with a new Host section or the end of the file. A single * as a pattern can be used to provide global defaults for all hosts.
HostName : Specifies the real host name to log into. Numeric IP addresses are also permitted.
User : Defines the username for the SSH connection.
IdentityFile : Specifies a file from which the user’s DSA, ECDSA or DSA authentication identity is read. The default is ~/.ssh/identity for protocol version 1, and ~/.ssh/id_dsa, ~/.ssh/id_ecdsa and ~/.ssh/id_rsa for protocol version 2.
ProxyCommand : Specifies the command to use to connect to the server. The command string extends to the end of the line, and is executed with the user’s shell. In the command string, any occurrence of %h will be substituted by the host name to connect, %p by the port, and %r by the remote user name. The command can be basically anything, and should read from its standard input and write to its standard output. This directive is useful in conjunction with nc(1) and its proxy support. For example, the following directive would connect via an HTTP proxy at 192.1.0.253:
ProxyCommand /usr/bin/nc -X connect -x 192.1.0.253:3128 %h %p
LocalForward : Specifies that a TCP port on the local machine be forwarded over the secure channel to the specified host and port from the remote machine. The first argument must be [bind_address:]port and the second argument must be host:hostport.
Port : Specifies the port number to connect on the remote host.
Protocol : Specifies the protocol versions ssh(1) should support in order of preference. The possible values are 1 and 2.
ServerAliveInterval : Sets a timeout interval in seconds after which if no data has been received from the server, ssh(1) will send a message through the encrypted channel to request a response from the server. See blogpost “Open SSH Server connection drops out after few or N minutes of inactivity” for more information.
ServerAliveCountMax : Sets the number of server alive messages which may be sent without ssh(1) receiving any messages back from the server. If this threshold is reached while server alive messages are being sent, ssh will disconnect from the server, terminating the session.
Speed up ssh session
Multiplexing is nothing but send more than one ssh connection over a single connection. OpenSSH can reuse an existing TCP connection for multiple concurrent SSH sessions. This results into reduction of the overhead of creating new TCP connections. Update your ~/.ssh/config:
Host server1
HostName server1.cyberciti.biz
ControlPath ~/.ssh/controlmasters/%r@%h:%p
ControlMaster auto
See “Linux / Unix: OpenSSH Multiplexer To Speed Up OpenSSH Connections” for more info. In this example, I go through one host to reach another server i.e. jump host using ProxyCommand:
~/.ssh/config ##
Host internal
HostName 192.168.1.100
User vivek
ProxyCommand ssh vivek@vpn.nixcraft.net.in -W %h:%p
ControlPath ~/.ssh/controlmasters/%r@%h:%p
ControlMaster auto
For more info see following tutorials:
How To Reuse SSH Connection To Speed Up Remote Login Process Using Multiplexing
How To Setup SSH Keys on a Linux / Unix System
A note about shell aliases (outdated method)
WARNING! This bash shell aliased based setup may work out for you.
However,
I recommend that you use ~/.ssh/config file for better results in a long run. SSH config file is more advanced and elegant solutions.
The alias command only used here for demo purpose and it is here due to historical reasons.
An alias is nothing but shortcut to commands and you can create the alias use the following syntax in your ~/.bashrc file:
create a new bash shell alias as follow ##
alias server1= ssh -i /nfs/shared/users/nixcraft/keys/server1/id_rsa -p 4242 nixcraft@server1.cyberciti.biz
Then, to ssh into the server1, instead of typing full ssh -i /nfs/shared/users/nixcraft/keys/server1/id_rsa -p 4242 nixcraft@server1.cyberciti.biz command, you would only have to type the command ‘server1’ and press the [ENTER] key:
$ server1
References
See ssh_config(5) for more information on syntax and some of the other available options.
Top 20 OpenSSH Server Best Security Practices
]]>
‘m a new FreeBSD unix user and backup file on a FreeBSD based unix server. How can I check quota limits and disk usage using shell prompt on a FreeBSD based system?
You need to use the quota command line utility to see your disk usage and limits. By default only the user quotas are printed. Disk block usage and limits are shown in 1024-byte blocks.
Checking Disk Quota on FreeBSD Server
The syntax is as follows:
quota
quota -v
quota [options] username
quota [options] groupname
The following is sample output from my server:
$ quota -v
OR
$ quota -v -h
Sample outputs:
Disk quotas for user vivek (uid 40142):
Filesystem usage quota limit grace files quota limit grace
/mnt/sales 0B 0B 0B 0 0 0
/mnt/homes 7289M 97656M 107422M 579 10000000 11000000
Where,
-v : Display quotas on file systems where no storage is allocated.
-h : “Human-readable” output. Use unit suffixes: Byte, Kilobyte,Megabyte, Gigabyte, Terabyte and Petabyte.
You can use the following command over ssh based session:
ssh vivek@nas01 quota -hv
ssh vivek@server1.cyberciti.biz quota -hv
I strongly suggest that you read quota man page for more information.
]]>
know keeping a FreeBSD server up to date is a very important. How can I apply binary system patches and updates to a new installation of FreeBSD 10 server?
You need to use the freebsd-update tool. It is used to fetch, install, and rollback binary updates to the FreeBSD base system.
Find out current FreeBSD release
Type the following command:
uname -mrs
OR
uname -a
Sample outputs:
FreeBSD netbook02 10.0-RELEASE FreeBSD 10.0-RELEASE #0 r260789: Thu Jan 16 22:34:59 UTC 2014 root@snap.freebsd.org:/usr/obj/usr/src/sys/GENERIC amd64
FreeBSD install security updates and patch the server
Type the following command on a newly installed FreeBSD server:
# freebsd-update fetch install
Sample outputs:
freebsd-update fetch install
Looking up update.FreeBSD.org mirrors… 5 mirrors found.
Fetching metadata signature for 10.0-RELEASE from update4.freebsd.org… done.
Fetching metadata index… done.
Inspecting system… done.
Preparing to download files… done.
The following files will be updated as part of updating to 10.0-RELEASE-p5:
/bin/freebsd-version
/boot/kernel/ciss.ko
/boot/kernel/ciss.ko.symbols
/boot/kernel/kernel
/boot/kernel/kernel.symbols
/boot/kernel/nfsd.ko
/boot/kernel/nfsd.ko.symbols
/etc/defaults/rc.conf
/lib/libcrypto.so.7
/rescue/[
/rescue/atmconfig
/rescue/badsect
….
…
..
/usr/src/etc/defaults/rc.conf
/usr/src/sys/conf/newvers.sh
/usr/src/sys/dev/ciss/ciss.c
/usr/src/sys/fs/nfsserver/nfs_nfsdserv.c
/usr/src/sys/kern/kern_exec.c
/usr/src/sys/netinet/tcp_reass.c
/usr/src/sys/sys/proc.h
/usr/src/sys/vm/vm_map.c
/var/db/mergemaster.mtree
Installing updates… done.
Reboot the FreeBSD server
Type the following command:
# reboot
Verify new system
Type the following command:
# uname -mrs
OR
# uname -a
Sample outputs:
Fig. 01: Newly updated FreeBSD 10 server
See also
FreeBSD apply security updates for installed ports/applications
]]>
‘m installing FreeBSD 10 Xorg and xfce4 desktop. But, getting the following error:
(EE) Failed to load module “fbdev” (module does not exist, 0)
How do I fix this problem on FreeBSD 10 amd64 based system?
You need to install the X.Org xf86-video-fbdev driver. This can be installed using either ports or binary package using the pkg command.
Fixing (EE) Failed to load module “fbdev” (module does not exist, 0) on a FreeBSD Xorg
Open the Terminal app and login as root user using su – command:
su –
Install the xf86-video-fbdev via the port
Type the following command:
# cd /usr/ports/x11-drivers/xf86-video-fbdev/
# make install clean
Install the xf86-video-fbdev via the binary package
Type the following command:
# pkg install x11-drivers/xf86-video-fbdev
OR
# pkg install xf86-video-fbdev
Sample outputs:
Updating repository catalogue
The following 1 packages will be installed:
Installing xf86-video-fbdev: 0.4.4_4
The installation will require 28 KB more space
11 KB to be downloaded
Proceed with installing packages [y/N]: y
xf86-video-fbdev-0.4.4_4.txz 100% 11KB 11.1KB/s 11.1KB/s 00:00
Checking integrity… done
[1/1] Installing xf86-video-fbdev-0.4.4_4… done
Test new Xorg config
First, create an Xorg config file:
# Xorg -configure
This will generate a file named /root/xorg.conf.new which attempts to load the proper drivers for the detected hardware. Next, test that the automatically generated configuration file works with the graphics hardware by typing:
# Xorg -config xorg.conf.new -retro
If the test is successful, copy the configuration file to /etc/X11/xorg.conf:
# cp xorg.conf.new /etc/X11/xorg.conf
References
FreeBSD handbook: Chapter 6. The X Window System
]]>
‘m a new Linux / Unix system user. How can I set encrypted tunnel between my desktop/laptop computer and server in a remote data center to bypass the limits in a network? How do I create a reverse SSH tunnel on Unix-like systems?
SSH tunnelling can be thought as a poor-man’s-VPN. It is handy in situations where you would like to hide your traffic from any body who might be listening on the wire or eavsdropping. You can use such tunnel between your computer and your Unix/BSD/Linux server to bypass limits placed by a network or to bypass NAT, and more.
More about the Internet protocol, ports, tcp and udp
The Internet protocol is nothing but a set of rules for sending information between your desktop and the server on the Internet (or WAN or Lan). Each computer at least has one IP address. Each rule is like a language and in computer science you call it as a protocol. One can use protocols for communication over the Internet.
Common application protocol
For example, you can use HTTP (Hypertext Transfer Protocol) or HTTPS (Hypertext Transfer Protocol Secure) protocol to view images or download files from the Internet. You can use DNS (Domain Name System) protocol translates domain names such as www.cyberciti.biz, which can be easily memorized by humans, to the numerical IP addresses such as 75.126.153.206 and vice versa. You can use ssh (Secure Shell) for secure data communication, remote command-line login, remote command execution, and more.
Our sample setup
///////////
//Internet//
////////////
|
+—————+ | +————-+
| Unix/Linux | | | Linux/Unix |
| Server with +——+——-+ OSX/*BSD |
| OpenSSH SSHD | | Client |
+—————+ +————-+
randomhost.net client1.cyberciti.biz
75.126.153.206 192.168.1.42
(loopback interface 127.0.0.1)
Where,
randomhost.net – You have an accounts on this Linux/Unix based server.
client1.cyberciti.biz – Your private desktop/laptop computer that you use to connect to server1.cyberciti.biz server. You need to use loopback interface with the IP address 127.0.0.1. Only apps installed on the desktop such as browser, irc client, email client and more have access to 127.0.0.1.
Example: SSH tunnel for an IRC client
A tunnel between local port 8888 on the local interface (IP 127.0.0.1) and the IRC server at irc.freenode.net, bound to a remote machine’s port 6667. You are going connect to it using the loopback interface:
///////////
//Internet//
////////////
|
+—————+ | +————-+
| Unix/Linux | | | Linux/Unix |
| Server with +——+——-+ OSX/*BSD |
+—-+ OpenSSH SSHD | | Client |
| +—————+ +————-+
| randomhost.net client1.cyberciti.biz
| 75.126.153.206 192.168.1.42
| (loopback interface 127.0.0.1:8888) <=== SSH client
|
| +———————–+
+——-+ irc.freenode.net:6667 |
+———————–+
If you login to your shell account with: ssh myuser@randomhost.net for SSH tunnelling you have to add additional arguments. It goes like this:
ssh -L 8888:irc.freenode.net:6667 myuser@randomhost.net
If the server/shell account you are using to tunnel through is listening on a different port, for example 2745, it would be written like this:
ssh -p2745 -L8888:irc.freenode.net:6667 myuser@randomhost.net
This will open a tunnel between your computer to irc.freenode.net through your shell account on randomhost.net. All traffic will go through your shell account box as encrypted SSH traffic before reaching irc.freenode.net. Your computer now acts like a irc server listening to port 8888. Replace it with any ports you want above 1024 to avoid conflict.
To connect to your local port as if it s irc server. On irssi this would be:
/server 127.0.0.1 8888
This will also apply for any other irc clients such as X-Chat. Use 127.0.0.1/8888 for server name and you are good to go. Other fields remain the same.
Howto setup a reverse SSH tunnel
In a scenario where a machine is behind NAT or company firewall a normal SSH tunnel won t work. To overcome this, we have to make use of reverse SSH tunnel. To achieve this, you need an internet reachable box along with the machine behind NAT/firewall. During this guide we will call the machine behind NAT/firewall a NATbox and internet reachable machine an OPENbox.
For reverse SSH Tunnel, there are basically three ports involved. One is the SSH port of workstation, we use it forward the reverse tunnel port into it. The second, is the reverse tunnel port which gets forwarded to workstation s SSH port. The third, is the SSH port of the public box, we need that port to SSH into public box.
From outside if you use public box s SSH port, you log in to that box. If you use reverse tunnel port you get forwarded to workstation. You must be careful about usernames when doing this.
public box ip + public box SSH port + public box username -> access to public box
public box ip + reverse tunnel port + workstation username -> access to workstation
To establish reverse tunnel from workstation, you will use:
public box ip + public box SSH port + public box username
And setup the reverse tunnel on a different random port and forward it to local SSH port.
To further protect the SSH daemon, you can implement port knocking where the SSH port is blocked by default and when you send special packets the port is opened for you. You can have the SSH port opened for certain IPs.
Example
So, let us consider, OPENbox is listening to SSH on port 1234. Type following on NATbox:
ssh -p1234 -R 5555:localhost:22 openboxuser@OPENbox.example.com
This will initiate a connection from behind the NATd/firewalled box to the publicly reachable box listeing to SSH on port 1234. Once the connection is established it will create a reverse tunnel at port 22 for the remote party to connect and get in. Type the following command on OPENbox:
ssh -p5555 natboxuser@localhost
Since the NATd/firewalled box has an established connection to OPENbox, the tunnel will go through the same channel. In addition, type the following from anywhere else to access NATbox which will tunnel the traffic through OPENbox:
ssh -p5555 natboxuser@OPENbox
This requires an additional setup on the OpenSSHD server, add the lines to /etc/ssh/sshd_config
GatewayPorts yes
Save and close the file. Make sure you restart/reload the SSHD on the remote server.
Summary
The syntax is as follows to access remote server port without modifying firewall settings:
## Syntax ##
ssh -f -L {local-port}:localhost:{remote-server-port} user@remote.server-name-here.org
# Use port 8888 on the localhost to connect to port 4444 on host foo for user bar and run in the background#
# Use port 8888 for your apps such as firefox, xchat, and more #
ssh -D 8888 -f -C -q -N -p 4444 foo@bar &
Where,
-f : Requests ssh to go to background just before command execution.
-L port : Specifies that the given port on the local (client) host is to be forwarded to the given host and port on the remote side.
-p port : Port to connect to on the remote host.
-R : Specifies that the given port on the remote (server) host is to be forwarded to the given host and port on the local side.
-D port: Specifies a local dynamic application-level port forwarding.
-C : Requests compression of all data. This is useful for speeding up connection.
-q : Quiet mode. Causes most warning and diagnostic messages to be suppressed.
-N: Do not execute a remote command. This is useful for just for warding ports.
For more information see man pages: ssh(1),sshd_config(5),ssh_config(5).
This quick tutorial was contributed by Wendy Michele. You can too contribute to nixCraft.
]]>
‘m setting up a new FreeBSD server. I do not want to use a default root user who has full system access. How can I setup and grant sudo privileges to users on a FreeBSD VPS or server?
The root account has full system level access and usually reserved for admin tasks only.
The sudo command allows a very small delegation of power to users other than the root user. This is good tool if you have many users, logging everything the users do with privileges, and you are granting certain privileges. Unless the user is specified, sudo will escalate the privilege to root.
In this quick tutorial I will show you:
How to create a new user on a FreeBSD server.
How too add users access to the sudo command.
How to delete users from the sudo command.
Install sudo app on a FreeBSD server/vps
Sudo is a program designed to allow a sysadmin to give limited root privileges to users and log root activity. The basic philosophy is to
give as few privileges as possible but still allow people to get their work done. You can install sudo using port, type:
# cd /usr/ports/security/sudo/ && make install clean
Or as a binary package, enter:
# pkg install security/sudo
Adding a new user on FreeBSD
The recommended command-line application for adding new users is called adduser. Just type the following command and it will walks through the steps for creating a new user account on a FreeBSD VPS or server:
# adduser
Grant users administrative privileges on FreeBSD
The configuration file is located in /etc/sudoers or /usr/local/etc/sudoers and is read-only by default. visudo command can be used to easily modify the sudoers
configuration file.
To add a username to sudoers
$ su –
# visudo
Append the following line and exit from a text editor:
alice All=(ALL) ALL
This will allow the user alice to issue sudo command and be root. It will first ask for her password. To skip asking for password when sudo command is issued, change the line to:
alice ALL=(ALL) NOPASSWD: ALL
If you want alice to only have sudo privileges on one server in a network and restrict her to /bin/ls command as user, you would add the following:
alice server1=(bob) /bin/ls /home/bob
Every usage of sudo gets logged in /var/log/messages file.
A sudo user can escalate to root by using the sudo command:
[alice@hostname~]$ sudo su –
OR
[alice@hostname~]$ sudo -s
Or, to execute a command as root:
[alice@hostname ~]$ sudo whoami
Or, to execute a command as another user:
[alice@hostname ~]$ sudo -u bob ls /home/bob
Remove a username from sudoers
To remove the privileges, take the user off the sudoers configuration file i.e. delete following line from config file by running visudo command:
alice ALL=(ALL) NOPASSWD: ALL
OR
alice All=(ALL) ALL
To completely remove a user (say alice) from the system, run rmuser as the superuser:
# rmuser alice
For more usage patterns, see the man pages: sudo(8),sudoers(5),visudo(8)
This quick tutorial was contributed by Wendy Michele. You can too contribute to nixCraft.
]]>
‘m a new Unix system user. How can I manage process on a FreeBSD operating systems?
A process is nothing but an executing program on FreeBSD or Unix-like system. Each process on the system provides the resources needed to run a program such as vim or firefox. Each process has:
A unique process identifier number (PID)
A virtual address space
A security context
Open devices/handles, executable code
Environment variables, priority and more.
In this quick tutorial, I will write about process management on a FreeBSD operating systems.
View running processes in FreeBSD
The ps or process status command is a command that lists process activities. Many people use the top command to interactively list the processes, but for scripting purpose ps is user friendly. The basic syntax is as follows:
$ ps
Sample outputs:
Fig.01: FreeBSD ps command output showing process
List process using ps command
Example using flags:
$ ps -auxw
Fig.02 ps command with flags
Where,
a = Display information about other users’ processes as well as your own.
u = Display the processes belonging to the specified usernames.
x = When displaying processes matched by other options, skip any processes which do not have a controlling terminal. This is the default behavior.
w = Use 132 columns to display information, instead of the default which is your window size.
How to list process using top command
Another easiest way to find out what processes are running on FreeBSD is to type top command:
$ top
Sample outputs:
last pid: 762; load averages: 0.35, 0.30, 0.20 up 0+00:17:04 11:09:01
15 processes: 1 running, 14 sleeping
CPU: 0.0% user, 0.0% nice, 0.0% system, 0.4% interrupt, 99.6% idle
Mem: 13M Active, 16M Inact, 65M Wired, 23M Buf, 3624M Free
Swap: 4071M Total, 4071M Free
PID USERNAME THR PRI NICE SIZE RES STATE TIME WCPU COMMAND
736 ec2-user 1 20 0 17064K 2660K wait 0:00 0.00% sh
734 ec2-user 1 20 0 25752K 3024K pause 0:00 0.00% screen
714 ec2-user 1 20 0 86472K 7228K select 0:00 0.00% sshd
735 ec2-user 1 20 0 25752K 4432K select 0:00 0.00% screen
712 root 1 20 0 86472K 7228K select 0:00 0.00% sshd
602 root 1 20 0 24104K 5292K select 0:00 0.00% sendmail
411 root 1 20 0 14492K 2136K select 0:00 0.00% syslogd
715 ec2-user 1 20 0 17064K 2668K wait 0:00 0.00% sh
762 ec2-user 1 20 0 21916K 2816K RUN 0:00 0.00% top
657 root 1 20 0 16592K 2256K nanslp 0:00 0.00% cron
627 root 1 20 0 61204K 6556K select 0:00 0.00% sshd
333 root 1 20 0 13164K 4508K select 0:00 0.00% devd
294 root 1 52 0 14624K 2236K select 0:00 0.00% dhclient
605 smmsp 1 52 0 24104K 4952K pause 0:00 0.00% sendmail
332 _dhcp 1 52 0 14624K 2340K select 0:00 0.00% dhclient
To quit from the top command type (or hit) q and to display help hit h.
Quickly finding the PID of a process on FreeBSD
Use the pgrep command to search the process table on the running system and prints the process IDs (PID) of all processes that match the criteria given on the command line. The syntax is:
pgrep process
pgrep -u user process
pgrep firefox
pgrep -u www-data nginx
A quick way of getting the PID of a process called dhclient is with the pgrep command, type:
$ pgrep dhclient
Sample outputs:
332
How to send processes signals in FreeBSD Unix system
You can send signals to all processes in FreeBSD. For example, SIGTERM can gracefully kill the process.
Send processes signals by PID
The kill command kills process by process identification (PID). Note that the user must have sufficient privileges to kill the process. The basic syntax is as follows:
$ kill <PID>
$ kill -s signalName <PID>
For example:
$ kill -s SIGTERM 454
$ kill -signalName <PID>
$ kill -SIGHUP 6765
$ kill -signalNumber <PID>
$ kill -9 868
To find your PID use pgrep command. It will look like this for example:
$ pgrep firefox
23872
From there you can issue the kill command to kill firefox process:
$ kill 23872
You can also send multiple kills.
$ kill <PID> <PID> <PID>
$ kill 3455 79754 3454
If you want to kill without cleaning up you use the -9 signal:
$ kill -9 <PID>
$ kill -9 5858
List signals
Type the following command:
$ kill -l
Sample output:
Fig.03: List the signal names with the -l option on Unix
SOME OF THE MORE COMMONLY USED SIGNALS AND MEANING
———-+———————————————-
SIGNAL | NAME (Meaning)
———-+———————————————-
1 | HUP (hang up)
2 | INT (interrupt)
3 | QUIT (quit)
6 | ABRT (abort)
9 | KILL (non-catchable, non-ignorable kill)
14 | ALRM (alarm clock)
15 | TERM (software termination signal)
To kill process by name, use killall command
The basic syntax is as follows:
$ killall process
$ killall firefox
$ killall -SIGNAL process
$ killall -term firefox
$ killall -15 command
$ killall -15 firefox
To kill user’s process:
$ killall -u <user> process
$ killall -u tom firefox
Depending upon your shell you might need different flags or signals. Consult your man pages (man signal). The examples are so you get an idea and not absolute. For example, on my laptop using csh I cannot use the command killall process. I must use at least one option or argument to specify process. Note, there is also pkill command which kills the processes by name, but since it uses pattern matching and not the precise process name, it can be potentially dangerous compared to killall. Here is an example of dangerous pkill command which kills FreeBSD based server or desktop:
$ sudo pkill -v firefox
The -v option reverse the sense of the matching; display processes that do not match the given criteria. See pkill man page for more info.
How to adjust process priorities
The nice command runs process at a low priority. nice assumes the value of 10. The priority is a value range -20 to 20. The default priority is 0, priority 20 is the lowest possible. Negative numbers are expressed by -. You need to be root if you want to change the process prority to higher priorities. Different shells are different so it’s best to consult your nice manual page. I mainly use csh. nice command is more useful on servers or workstation where several processes are demanding more resources than the CPU can provide. Use following commands to set a larger chunk of the CPU time than a lower priority process on a FreeBSD.
nice command usage examples
Execute command date at priority 5 assuming the priority of the shell is 0.
$ nice -n 5 date
This is an example where you need to be superuser or root:
# nice -16 nice –35 date
Execute command date`at priority -19 assuming the priority of the shell is 0. I have never had to use this command because with today’s systems we have such high RAM+CPU and processing power these things aren’t a problem like when first introduced. It’s nice to know nice though just in case.
How to alters the scheduling priority of running processes
The nice command only works when beginning a new process i.e. start of the command. Use the renice command to alters the scheduling priority running processes. The syntax is:
$ renice priority pid
$ renice -n increment pid
$ renice -u user pid
To Change the priority of process ID’s 4242 and 344, and all processes owned by root, enter:
$ sudo renice +1 -u root -p 344 4242
How to see realtime and idle priority of of running processes
A process with a realtime priority is not subject to priority degradation, and will only be preempted by another process of equal or higher realtime priority. A process with an idle priority will run only when no other process is runnable and then only if its idle priority is equal or greater than all other runnable idle priority processes. Priority is an integer between 0 and RTP_PRIO_MAX (usually 31). 0 is the highest priority. 31 is the lowest priority. To see which realtime priority the current process is at, just type the following command:
$ rtprio
Sample outputs:
rtprio: normal priority
To see which realtime priority of process 715:
$ rtprio 715
To change the realtime priority of process 715 to 16, enter:
# rtprio 16 -1423
To run backup.py script while not disturbing other server usage, enter:
# idprio 31 /path/to/my/awesome/backup.py
See rtprio command man page for more info.
This quick tutorial was contributed by Wendy Michele. You can too contribute to nixCraft.
]]>